Tips for Building Effective Courses in Blackboard Ultra
Blackboard Ultra Course View was designed from the ground up to be an effective teaching and learning platform featuring consistent and clear navigation, intuitive design and interactive features, and emphases on accessibility and performance on all devices. The Center for Innovative Teaching and Learning provides Workshops, Consultations, and a host of web resources on teaching with Blackboard.
These are some of the strategies, approaches, and features that we have found particularly effective and efficient when building courses in Blackboard Ultra.
Moving to Ultra Course View
1. Build, Don’t Convert
Blackboard does have the ability to run a complete conversion on your Original Course View course. However, given the important differences between Original Course View and Ultra course view, including in navigation, implementation of features, and settings and configurations, a complete conversion often results in errors and content conversions that require substantial reworking, editing, or replacing. We have found that it generally takes less time and is more effective to rebuild the course, using the native Ultra Course View tools, using the Original Course as a reference, and when appropriate, to copy or retrieve text, documents, and links. Rebuilding this way also can provide a valuable opportunity to think carefully about the design of the course, assessment alignments, and opportunities for improvement.
2. Add Development Shell to Your Favorites
This tip combines two suggestions. First, consider building your Blackboard Ultra Course View course in a development shell, rather than in the regular course section. This gives you flexibility throughout the development period to build, experiment, and test without impacting the regular course section. When ready, use the Copy Content feature to copy the shell content into the regular course section. You can then continue to use the development shell to prepare for the next offering of the course or to save it as a master version. When working on a shell, as well as when teaching a course, use the Blackboard Ultra favorite feature on the courses page to keep your favorite shells and courses at the top of the page.
3. Consider the CITL Blackboard Course Template
The CITL Blackboard Course Template gives you a head start on building your course by providing a basic structure for the course using Learning Modules as well as basic information and resources to help you support your students. The template includes a welcome page for you to provide information on getting started with the course, suggested structure and resources for instructor and course information, and a host of student resources. A bonus of using the template is that many of the included features and resources address elements of the NIU Quality Essentials standards.
4. Use Granular Copy from Original or Ultra Courses
In Tip #1, we cautioned you to consider building your Blackboard Ultra Course view rather than using the Blackboard Convert tool, providing a clean, well structured, and thoughtful course build, with fewer errors and messy conversion translations to fix. Once you have built your structure, however, you may have some success and save some time copying certain items from your Original Course View courses. Blackboard Ultra’s Copy Content feature supports copying from both Ultra and Original courses, and copying particular individual items, such as files, links, rubrics, and tests should copy over with few issues. More complex items, such as assignments and discussions often introduce errors or unexpected formatting issues, items that are not supported, such as surveys, wikis, and certain test items will not copy at all.
Building in Ultra Course View
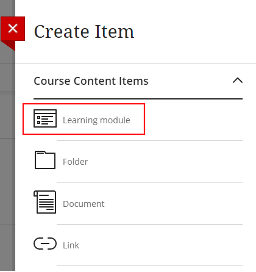
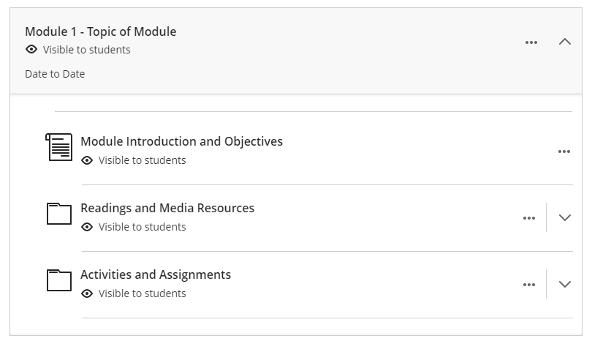
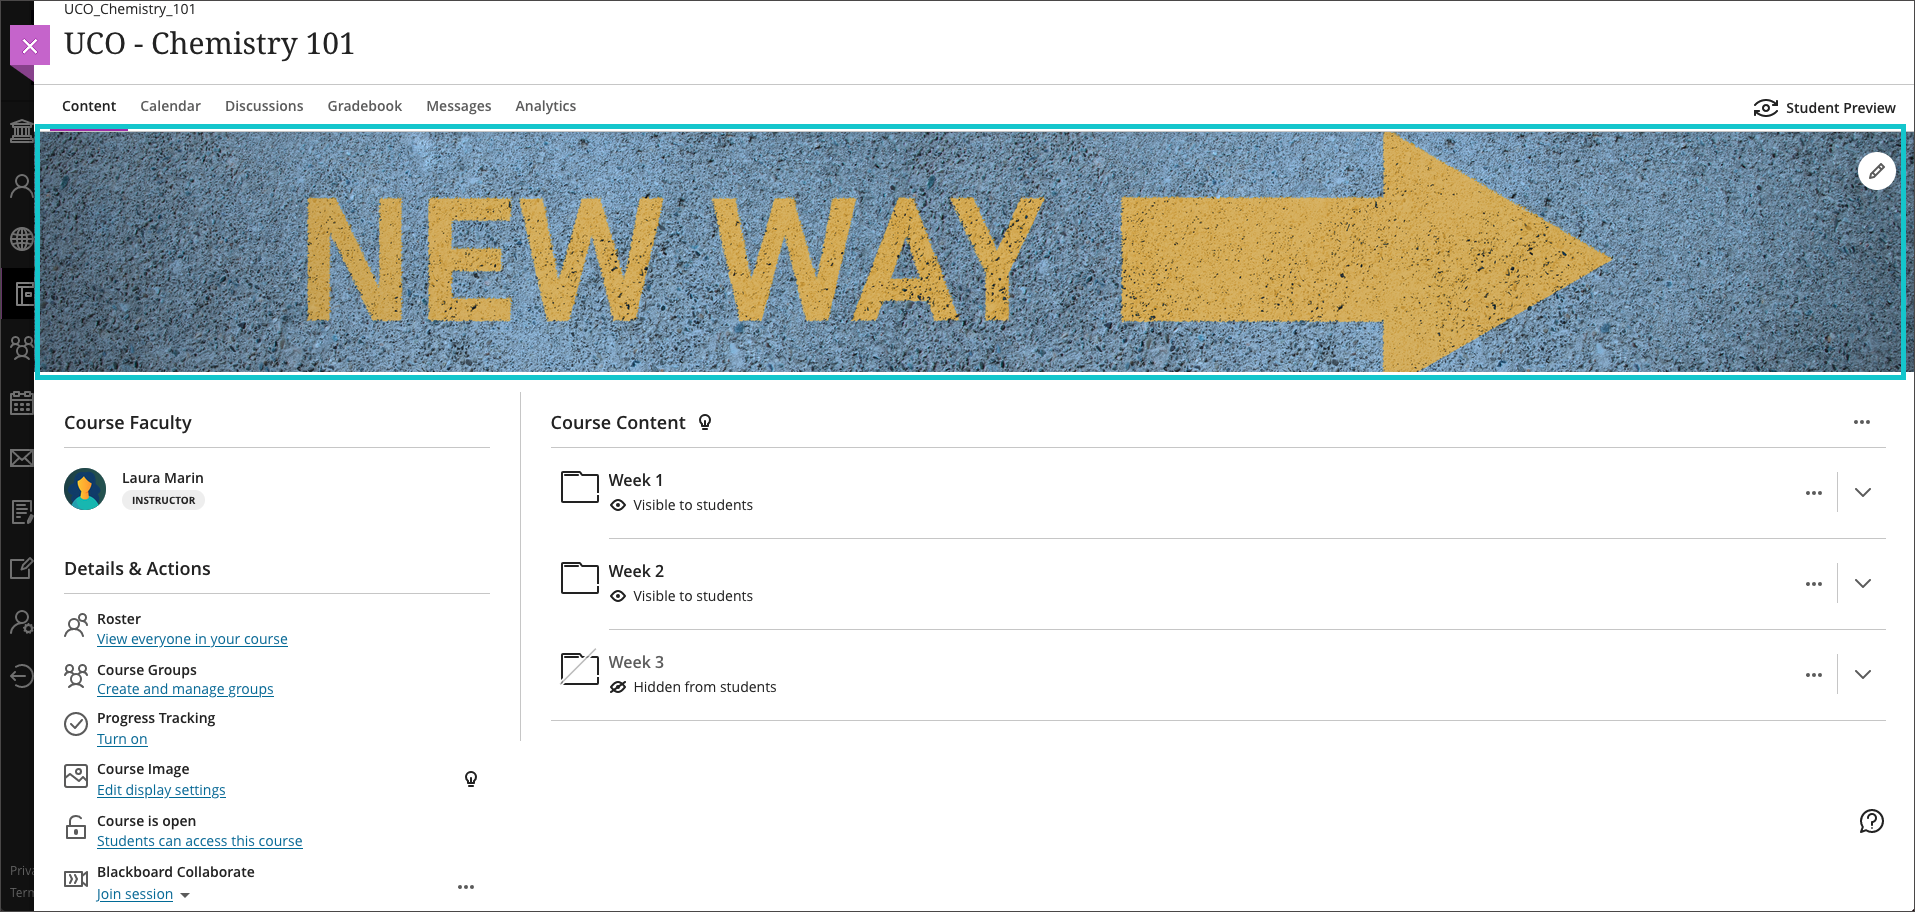
1. Use Learning Modules for Structure
Consider using Ultra Learning Modules to create the top-level structure of your course, including the weekly or topical subdivisions of your course. Using learning modules as a container for items and folders creates a clear visual clustering of content that can help students focus on the module and its contents. Learning Modules also facilitate forward and backward navigation for students to view content sequentially, you can also force this type of sequential viewing if that is appropriate for your content.
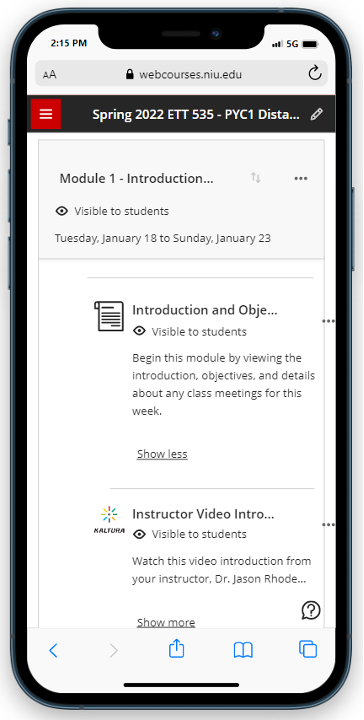
2. Create Names and Descriptions with Mobile in Mind
When naming modules, folder, and content items, create names and descriptions with mobile devices and small screens in mind. In titles, include the most important information first so that it is more likely to be readable and consider keeping the titles short and efficient. Use the description field to include other important information such as dates or instructions. Users can tap the “show more” link to expand the description field.
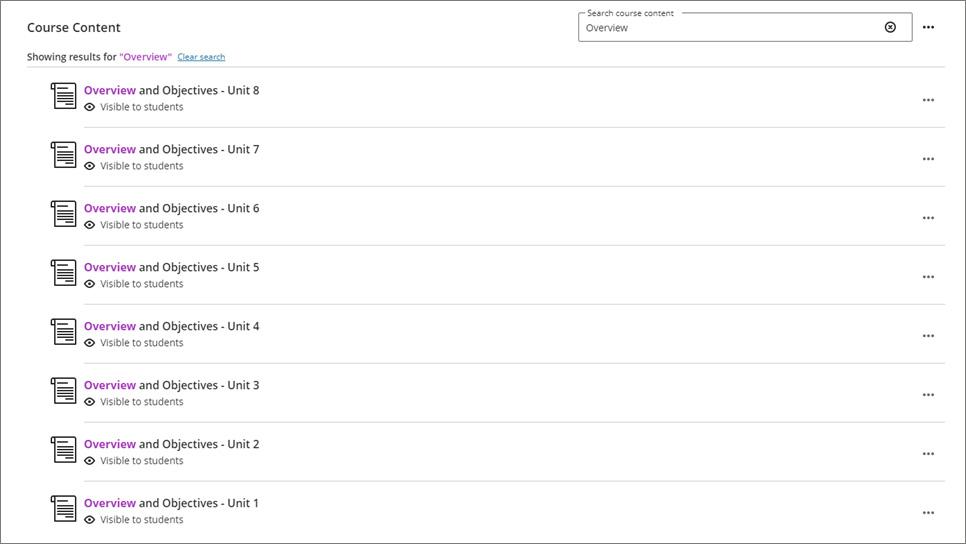
3. Use Distinct, Descriptive Titles to Increase Searchability
For many students, search is more intuitive and familiar than navigating a folder structure. The Ultra Course View search feature can make it much easier for students to find the items they need. However, it only searches the title of course items at this time, not the description or content of the item. To help students find specific items, use distinct and specific naming conventions (i.e., Introduction – Module 1, instead of just Introduction).
4. Create and Duplicate a Template Module
This time saving strategy can help you build a consistent module structure throughout your course in a relatively short time. Start by creating a template learning module with subfolders, items, and even naming conventions and descriptions that you would like to include in all of your modules. Then use the Copy Content feature, select the same course as the source and copy the module to duplicate it. Run this copy process 2-4 more times, selecting the duplicates each time to create the number of modules you need for your course.
5. Build Granularly to Track Progress
When Progress Tracking is enabled in your course, you can view whether students have opened or marked items as complete. Students also are able to check off items as they complete them (content) or they are automatically checked as they submit them (assessments). Creating more granular content, such as posting items individually instead of grouping them in a Document, provides both you and students with more information on their progress.
6. Use Ultra Documents and Content Items Strategically
Consider carefully whether to build your content within an Ultra document or by inserting content directly in a folder or Module. In an Ultra Document, you can insert a combination of formatted text, multimedia, links, files, and other objects to build a coherent content presentation document. This approach is best when content items inserted in the Ultra document are closely related or address the same topic and are meant to be consumed at the same time. Inserting multimedia, links, files, and other objects directly in a Module or Folder also has advantages, including making content easy to find and view and the ability to view content sequentially using Learning Module navigation arrows. A final advantage of inserting content items directly is that students' interactions with these items can be analyzed using the Progress Tracking feature, something that is not true of content items inside of an Ultra Document.
7. Move Content with Your Keyboard
Many areas of the Blackboard Ultra interface support drag-and-drop for moving and reordering items. While effective, drag-and-drop can be tricky when the desired location is off of the screen, inside of a module or folder, or when working with a laptop touchpad or small screen. Instead of dragging and dropping, you can move items with your keyboard. To move an item with your keyboard, first use your mouse to click the plus icon just above the content you want to move. Then press the TAB key to tab over to the “move” symbol. Hit ENTER to activate the move function and arrow keys up and down to position the item. To put the item inside of a closed folder or Learning Module, position the item on top of that container and use the right arrow to open the container. Once the item is in the desired position, press the ENTER key to finish the move.
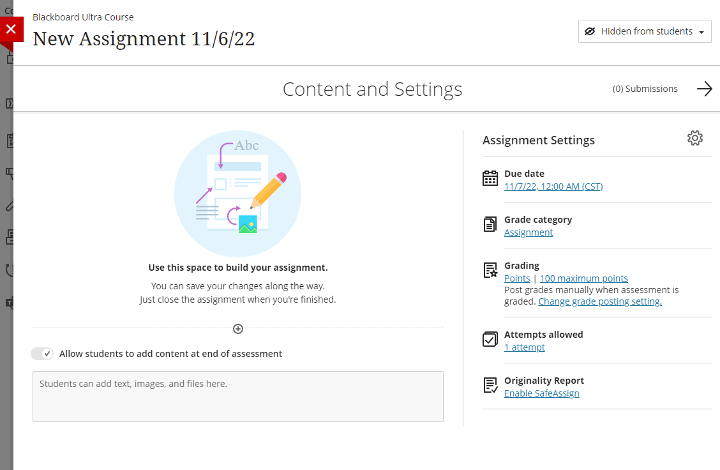
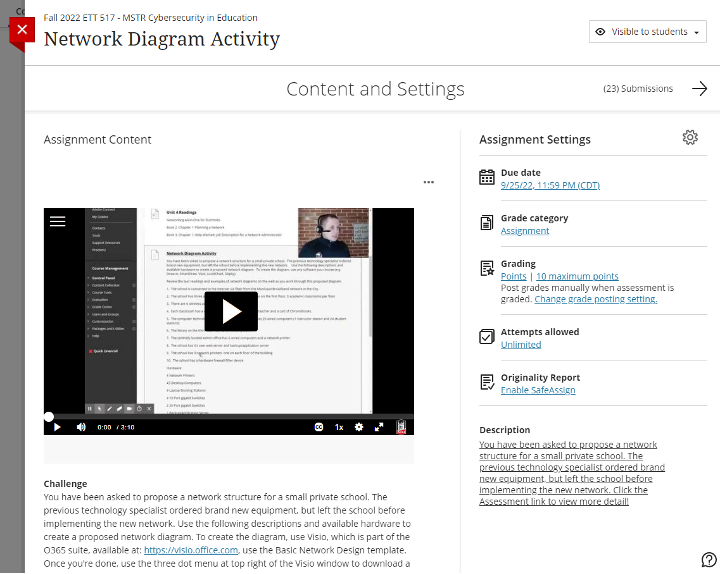
8. Use Assignment Content Area for Instructions and Support
In Blackboard Ultra, the Assignment Assessment item type allows you to create an assignment submission area, complete with due dates, grading options, rubrics, and so on. Instead of including the instructions for the assignment and supporting materials outside of the assignment, use the Assignment’s content area to build your assignment, including instructions, supporting documents and media, and other content. When using this area for instructions and assignment support, click the + button and choose the Add Text option to insert a rich text editing field. This field will allow you to add those supporting content types. If you’re including documents in your assignment instructions, be sure to include them using the Attachment function in the Add Text rich text box and not by using the Add local file option from the + button. Adding a file using the Add local file function will prevent you from being able to make changes/corrections to the file after anyone has accessed the assignment.
9. Set Up the Gradebook as Early as Possible
The Blackboard Gradebook is more than a tool for you to record and calculate grades - it is also a critical method for students to track their progress and achievement in their courses. Because all of the due dates are also visible there, it helps students plan ahead and manage their time across all of their courses. Consider setting up all of the assessments in the course at the start of the semester and setting Release conditions to control their visibility. Even if the content and instructions aren't prepared, this lets students see everything that is required for the course. It also allows you to set up the Overall Grade calculation early so that students always have a sense of what grade they are earning in the course.
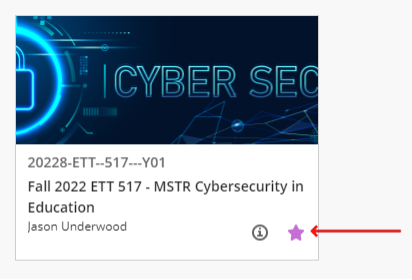
10. Add a Course Banner to Visually Brand Your Course
Visual cues can help you and your students be confident in the actions you take in your courses, and a course banner is a great way to develop a visual brand for your course. The course banner is visible within the course and is used as the course card on the Courses page (if you are viewing cards instead of rows). Add the course banner in the Details & Actions panel by clicking the Course Image link. The banner should be 1200 x 240 pixels at a minimum; we actually recommend much larger (around 4800 pixels in width) for best results. Because the image will be scaled and cropped to fit the size of the browser window, it is best to keep the main content or focus of the image in the center and avoid text that might be cropped.

This work was developed by NIU Center for Innovative Teaching and Learning and is licensed under a Creative Commons Attribution-NonCommercial-ShareAlike 4.0 International License.
Get Help
Technical Support and Student Help
Division of IT Service Desk815-753-8100
servicedesk@niu.edu