Use your course's Gradebook page to quickly access its coursework and enrolled students. You can customize the gradebook, create calculations, search submissions, and upload or download grades.
Access the Gradebook
The Gradebook is always accessible from the top navigation of your course. Click the Gradebook tab to open the Gradebook. If you have submissions that need grading, the number to grade appears next to the tab as an indicator. An exclamation point indicates that all submissions are graded, but grades for one or more assessments may need to be posted.

Instructors and students use the same tab but have different views of the Gradebook based on their role.
Gradebook Views
There are five views in the Gradebook. While a lot of functionality is available on every view, there are also distinct features for each. Blackboard will remember and bring you back to the last view that you used.
Overview
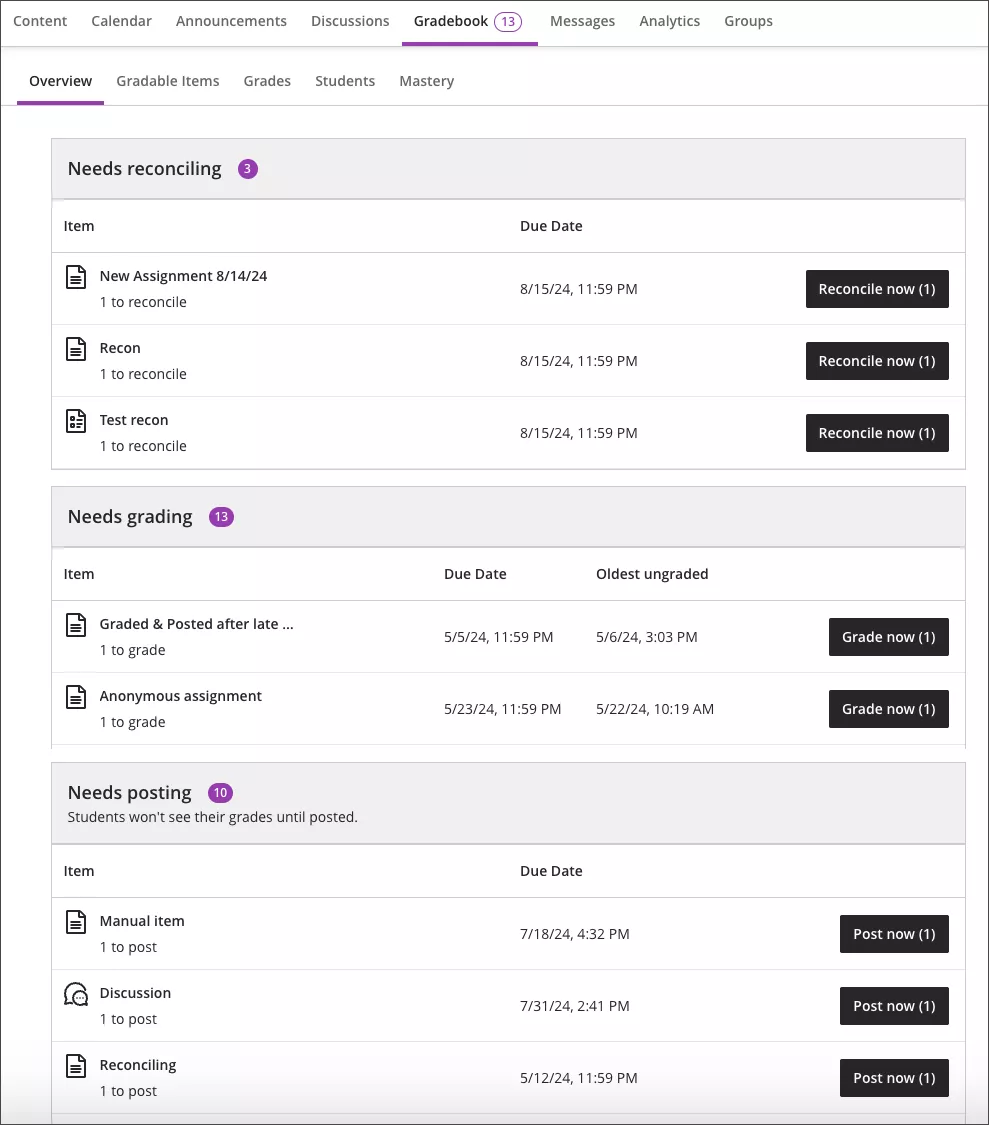
The Overview view displays grading tasks for you to complete:
- Needs grading lists submissions ready for grading with the oldest ungraded submissions at the top of the list, allowing you to prioritize grading tasks. Click Grade now to open the submission and begin grading. Peer review assignments are not listed in Needs Grading.
- Needs posting lists graded assessments that are ready to be posted. Click Post now to immediately post the graded assessment.
- Needs reconciling lists all items that use parallel grading and are ready for reconciliation. Click Reconcile now to open the Submissions tab for the item where you can review grades and feedback from others before determining the final grade. NOTE: This section only appears if you are an assigned grader for parallel grading. It's hidden when you have no items for reconciliation.
Gradable Items
The Gradable Items view displays all gradable items in your course. You can view due dates, grading status, and item categories. You can also post grades and adjust the overall grade calculation for the course.
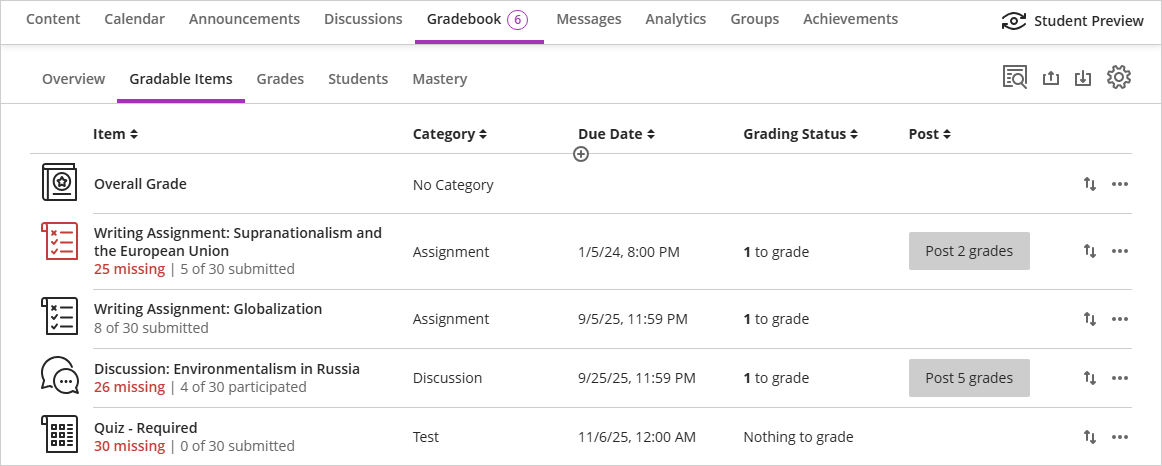
- Click an item’s name to go to its Submissions or Grades & Participation page.
- Click the X to grade message (e.g., 11 to grade) to go directly to the assessments' Submissions page and start grading.
- click the Post X grades to post all of the grades entered for that item and make the grades visible to students.
- Click the ellipsis (...) to edit or delete an item. CAUTION: deleting an item with submissions will also delete the submissions with no way to retrieve them.
- Items with missing submissions past the due date display in red.
- Use the move button (up/down arrows) to drag and drop items in a new order.
Grades
The Grades view displays each student’s grade for a specific assignment, with one student per row and one gradable item per column. Use the arrow buttons at the top of each column to sort into ascending or descending order. Use the Search and Filter options to find exactly the information you need. You can search and filter by student name, group name, gradable item, assessment type, and categories.
On a larger device like a tablet or laptop, use the horizontal scrollbar at the bottom of the Grades table to view more columns. If you have additional columns but do not see the horizontal scrollbar, check your device settings to always show scroll bars.
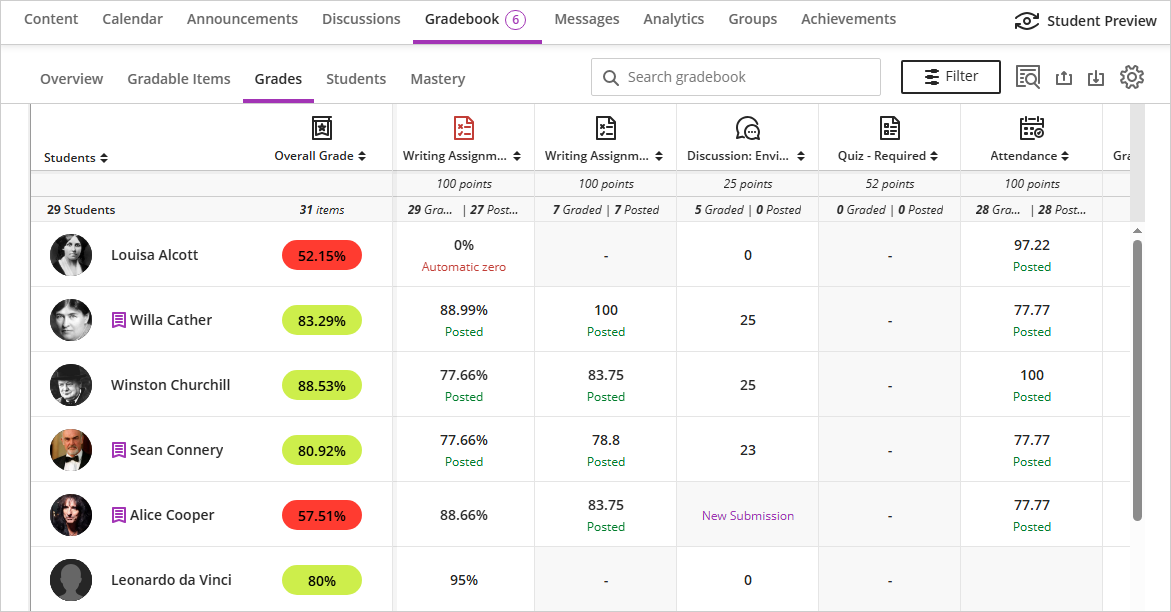
In the grid, you can select a student’s gradable item (i.e., click in one of the cells) to open a menu with these options, depending on the item type:
- View — Go directly to the assignment submission and start grading.
- Feedback — Enter feedback for overridden test/assignment grades and automatic zeros.
- Post — Post a grade that’s been assigned but not yet posted.
- Add or edit exceptions — If an assignment is timed or has a due date, you can add exceptions here, as well as allow multiple attempts.
- Add or edit exemptions — You can remove an assignment from being counted towards a student’s overall grade.
When you select a gradable item at the top of the Grades view, a menu opens with options to edit or delete the item or send a reminder. Additional options including Question Analysis, Download Results, Statistics, and Download Submissions are available based on the type of gradable item and whether students have made submissions.
Students
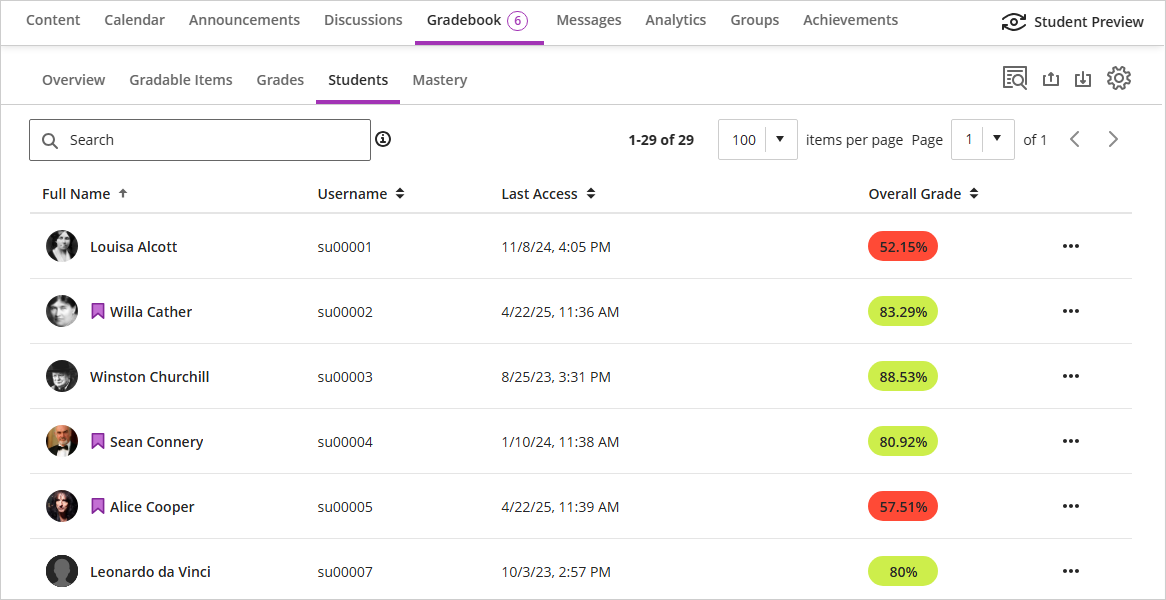
The Students view lists the names of all your students with their dates of last access and their overall grades. You can view overall grades if you’ve set up the overall grade for the course. Students with grading accommodations have a purple flag with their name.
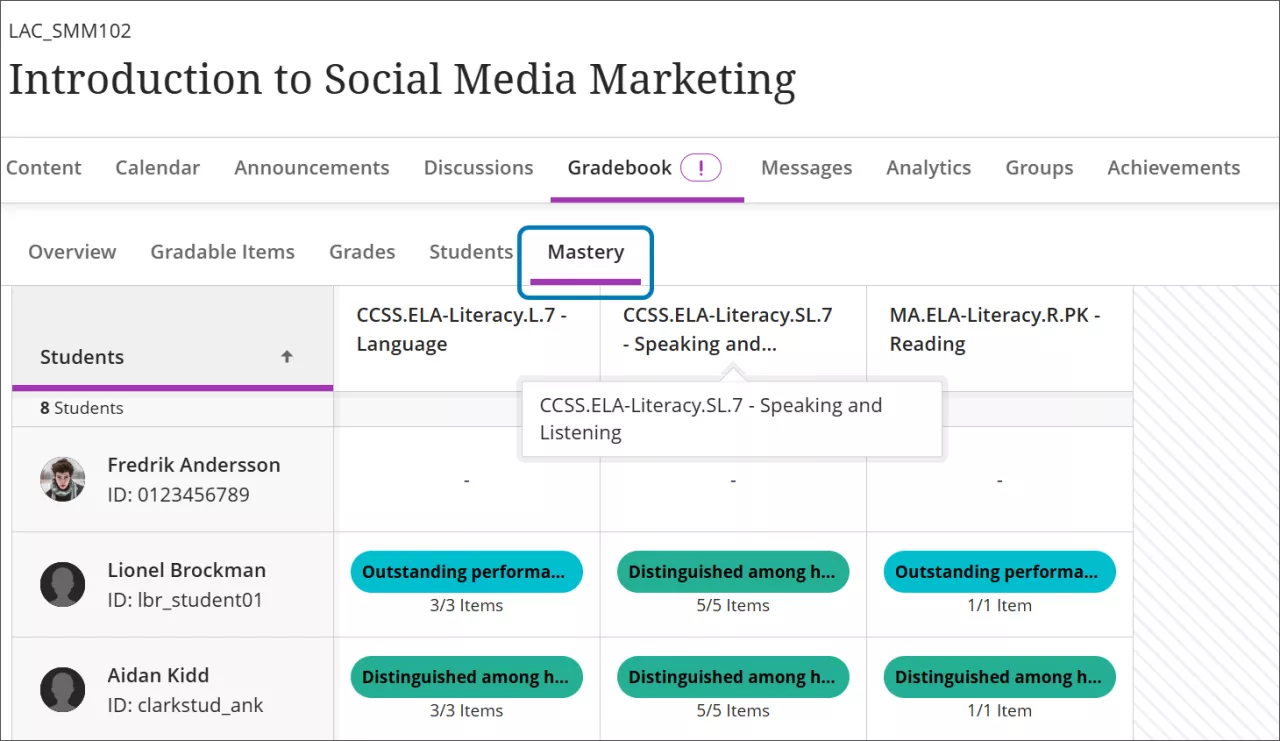
Mastery
The Mastery tab in the Gradebook allows you to review how students' course activities and performance align with any Goals you have associated with your assessments. You must have added goals to one or more assessments in your course for this tab to be populated.
Because this feature is not used in most courses, the Mastery tab is disabled by default. You can enable it in the Course Settings at the upper right corner of your course. Once enabled, you can also determine whether it is visible to students.
Gradebook Settings
You can use Gradebook Settings to customize your Gradebook to match your teaching style and course goals. Click the Gear icon on any view of the Gradebook to open the Settings panel.
Key settings:
- Grade Schemas - map percentage grades to letter grades or another notation for reporting performance
- Student Performance - set thresholds for alerts that appear on your Activity Stream
- Automatic Zeros - you can choose to automatically assign zeros to all missing assessment submissions after the due date (automatic zeros are posted immediately)
- Item Management - configure column visibility for yourself and other non-student users
- Grade Categories - add custom categories that you can use to group similar coursework for the purposes of weighted grading calculations
- Course Rubrics - create, review, and edit all rubrics used in the course (note that rubrics cannot be edited once they have been used for grading)
Frequently Asked Questions