Center for Innovative Teaching and Learning staff assist faculty with issues relating to course design, document formatting and transfer, assessment tools, and the other teaching aspects of Blackboard. Contact citl@niu.edu with questions or submit questions using our Ask a Question form.
Adding Files to Your Course
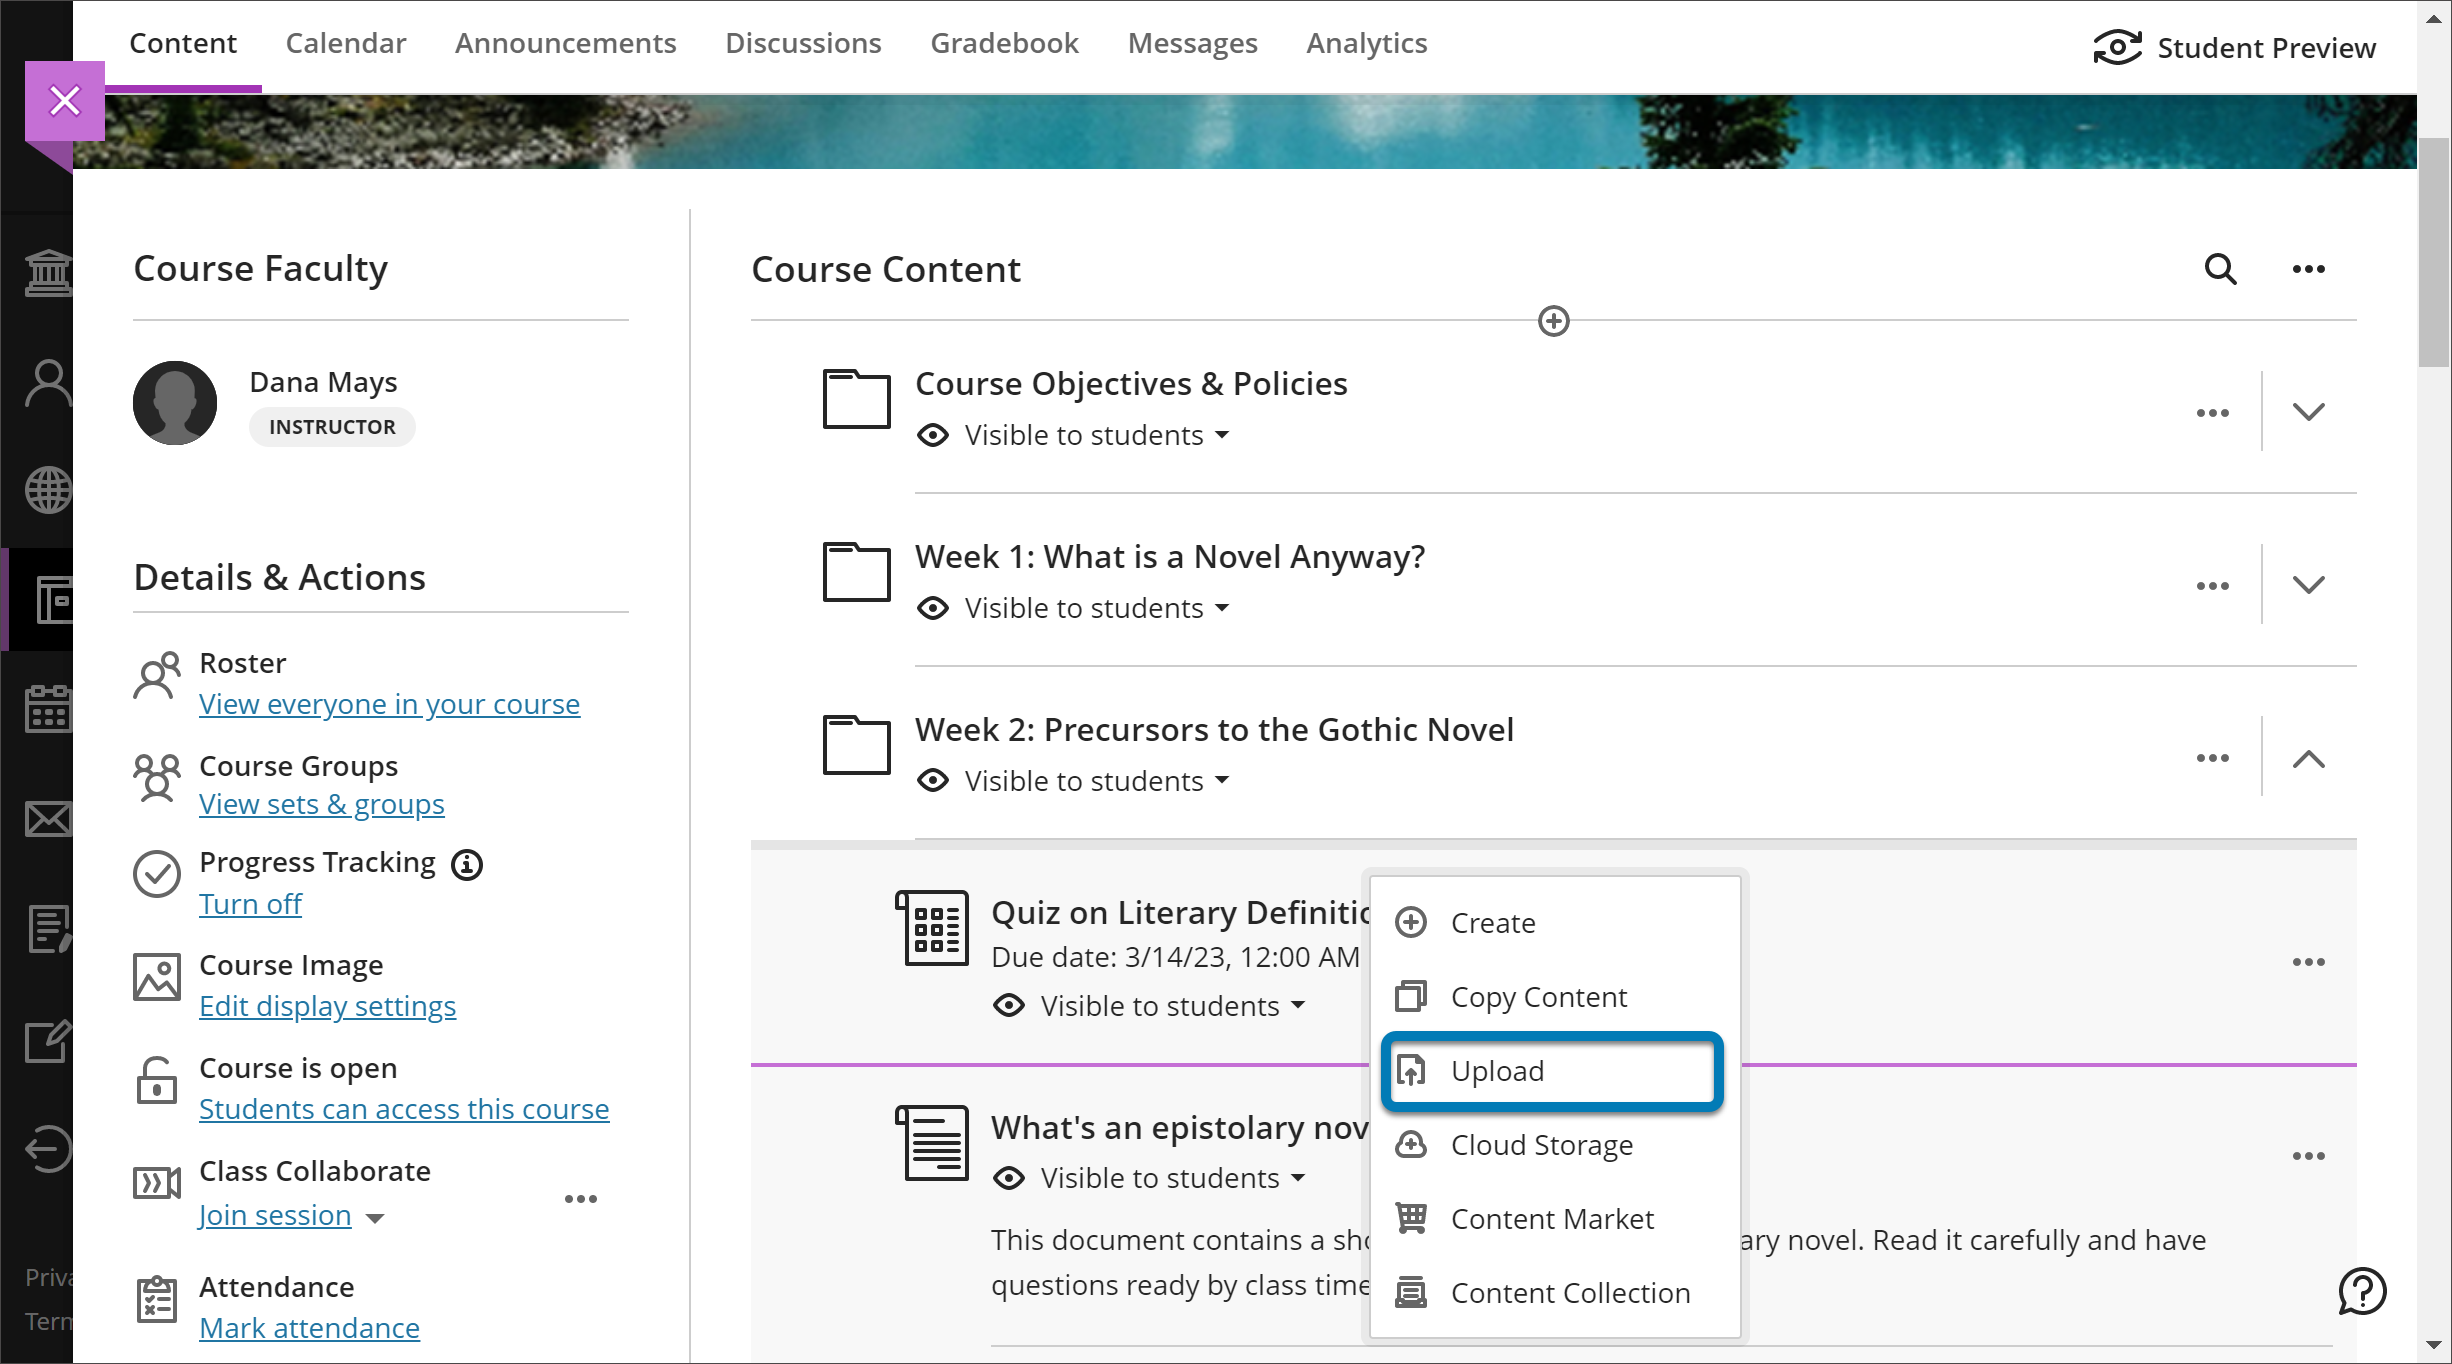
Add files anywhere on your Course Content page by clicking the plus sign (+) and selecting Upload. You can also add files or entire folders by dragging and dropping from the folder on your computer into its desired location. Once the upload is complete, you will be able to determine whether students should be able to download the file and/or view it in the browser.
To edit a file, click the three dots (...) to right. You can the file name, align with goals, replace the file, or add a description. Drag and drop to move the file to a new location, including into a learning module or folder.
You can also add files to a Document, to combine text and other media on a single page.
Add files from cloud storage
If you already have files stored in the cloud, such as in OneDrive® and Google Drive™, you can add them to your course. You may choose multiple files from cloud storage to add to your Course Content page in one action. The files you add are copies. If you make a change to a file in cloud storage, you need to upload a new copy in your course.
Frequently Asked Questions
Course organization will vary from discipline to discipline. Some basic planning will save you from having to restructure once your course creation is underway. We generally recommend organizing your course chronologically as opposed to by content type, so you would create folders or learning modules for each week or unit of your course (as opposed to separate folders for videos, readings, assignments, tests, etc.). This allows students to work through the course materials in a natural sequence with minimal searching and clicking.
- Establish a rough syllabus.
- Determine how the material will be presented: by units, weeks, individual class periods.
- Begin building a single folder or learning module
- Decide what components should be included in each folder (such as topic overview, objectives, assigned reading, assignments, quizzes/exams, online discussion topic, etc.)
- Develop a template for each item, such as an Overview Document that has standardized headings
- Copy the folder or learning module multiple times to create a consistent structure for each unit or week
- Collect materials for each unit
- Begin transferring files into the folder structure (tip: you can drag and drop multiple files at once to make this quicker!)
- Build formative and summative assessment opportunities
- Check the course structure and sequence using Student Preview
Courses will remain on the campus servers for a minimum of 5 years. After that time, faculty will be notified that courses will be removed from the system. Courses can be copied and reused/redeveloped an infinite number of times.
Usually, you will need to upload the .zip package into the Blackboard Content Collection and then add a link to it in your course.
Load Package into Blackboard
- Log in to Blackboard
- Click Tools in the left base navigation menu
- Click Content Collection
- Go to the Courses folder and navigate to the correct course or create a new folder (particularly if you will use this tutorial/lecture across multipel semesters)
- Click Create Folder and name the new folder for the tutorial (then click Submit)
- Click on Upload and select Upload Package
- Browse for your .zip file and click Submit
Add the Tutorial to a Content Area
- In the Course, navigate to the folder or learning module where you would like the file to be accessed
- Click the plus (+) icon and choose Content Collection from the menu
- Navigate to the folder with the tutorial, and click the checkbox next to the appropriate file to launch the tutorial/lecture (this is usually player.html, index.html, or something similar)
At NIU, every course in Blackboard has a 2 GB quota set by the Division of IT. We recommend working proactively to minimize your course files to avoid exceeding the quota through the following measures:
- Do not upload video or audio files directly to Blackboard. Instead, upload them to Kaltura or Microsoft OneDrive. If you use Kaltura, you can easily embed the media in your course for students to view and you get access to additional analytics on how students engage with your media. Kaltura will also provide students using mobile devices with streaming media that is optimized for their device and connection speed.
- Keep file sizes below 50-60 MB whenever possible. Larger files can be difficult for students to access if they do not have consistent and reliable broadband Internet access, or if they use a metered connection like a cellular data plan. You can easily compress images in Microsoft Word and PowerPoint to reduce the file size. Adobe Acrobat Pro has features to help you optimize PDF files and reduce their size.
- If you have recorded audio narration into a PowerPoint file, use the Export option to generate a video file and upload it to Kaltura.
If you have exceeded your quota, start by checking for any Unused Files in your course.
- Click the ellipsis (...) at the top right of your course (next to the magnifying glass)
- Click Unused Files from the menu
- Select one or multiple files to delete (tip: use the Files Size column header to sort from largest to smallest to identify files that will have the greatest impact)
- Click the Delete Files button
You can also request that your course quota be increased in 1 GB increments. You will need to submit the request separately for each course and again each semester.
- Go to it.niu.edu and log in if prompted
- Click the Request a service button
- Click Academic Technology Support in the left menu
- Click Extend Blackboard Quota
- Select Yes for Course Required
- Enter your course designator (e.g., UNIV 101 section 2)
- Select No for Organization Required and Content Management Required
- Click the Place Request button
Learn More
Tutorials
Quick Guides
Get Help
Technical Support and Student Help
Division of IT Service Desk815-753-8100
servicedesk@niu.edu